SAML2 Configuration with Azure AD
Overview
Bizagi provides an Azure Enterprise Application that helps you to configure your Azure AD with SSO easily. This section explains how you can configure the Enterprise Application.
1. Generate certificates to sign assertions (mandatory)
This step is not bound to Bizagi nor restricted by any special requirement of Bizagi (you normally do it yourself).
If you need some guidance or an example on this step, refer to Certificates for SAML 2.0 authentication.
To proceed with these guided steps, you need to have:
- One certificate to sign assertions (mandatory) in .P12 or .PFX file format. You need the password for the certificate file, as defined by you when you exported the public and private keys.
- One certificate to encrypt messages (optional) in .P12 or .PFX file format. You need the password for the certificate file, as defined by you when you exported the public and private keys.
Note
You will need to be in charge of managing your installed certificates (keep track of its expiration date and other relevant maintenance aspects such as changes in your Identity Provider's endpoints).
2. Configure your IdP in Bizagi
After you configure the application in Azure AD, now you must access the Bizagi Studio or the Management Console and register the Identity Provider. Follow the steps in Configure a SAML 2.0 IdP in Bizagi.
3. Download the Bizagi metadata file
After you configure the identity provider in Bizagi, you must generate the metadata file. Refer to Download the metadata file.
4. Configure the Enterprise Application in Azure AD
Do this in the admin options provided by Azure AD.
4.1 Access your Azure subscription with the Azure AD service using any of the following roles:
- Global Administrator
- Cloud Application Administrator
- Application Administrator
- Owner of the service principal
You will need to sign into Azure's portal at https://portal.azure.com.
4.2 Register the Enterprise Application
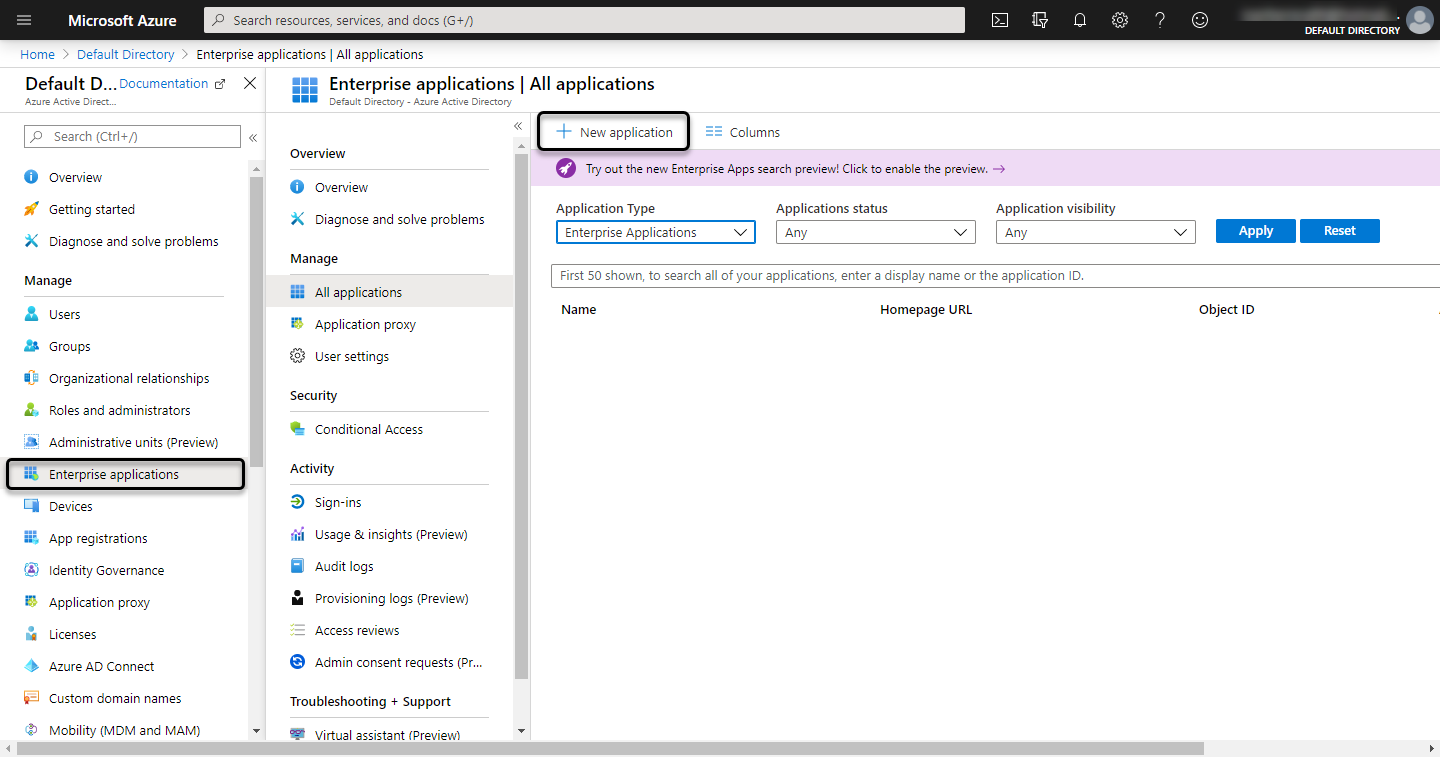
Open the Azure AD, and select the Enterprise Applications menu. Click New Application:
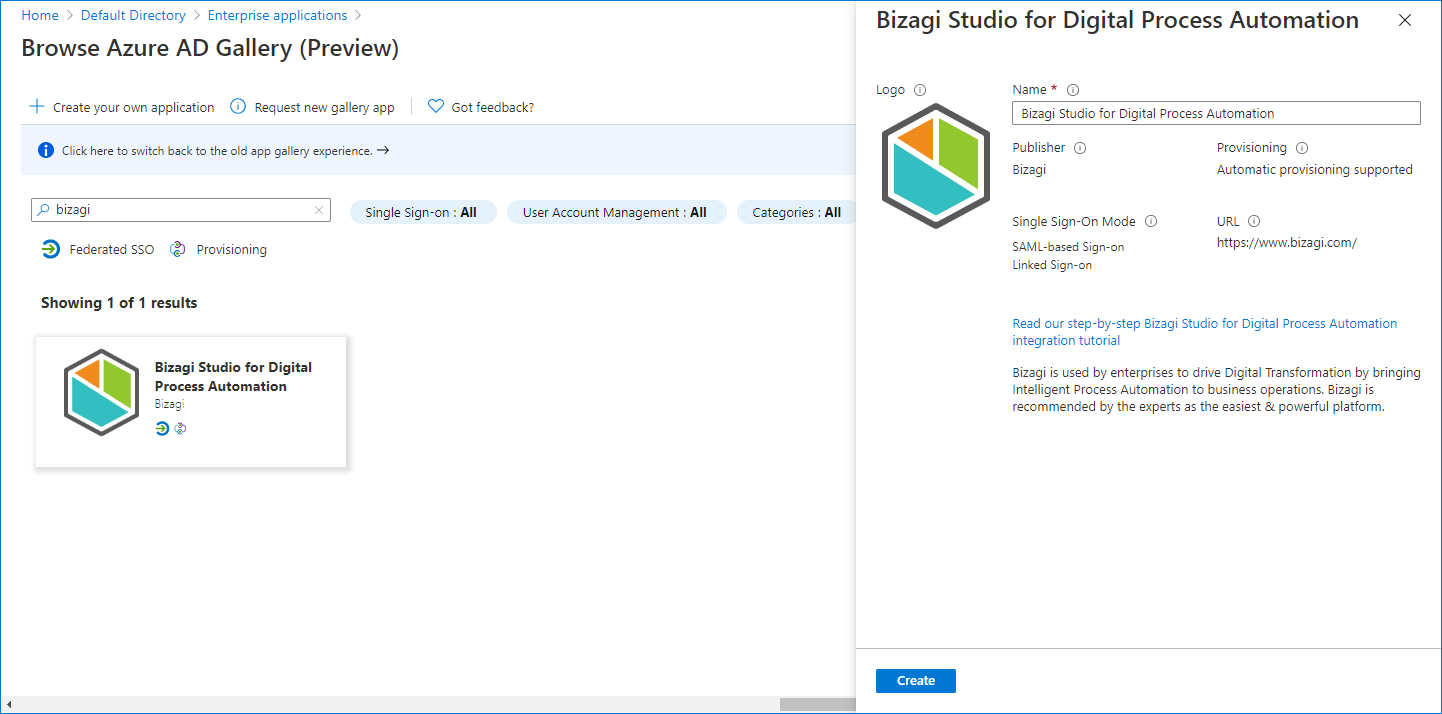
Search the Bizagi application and select it:
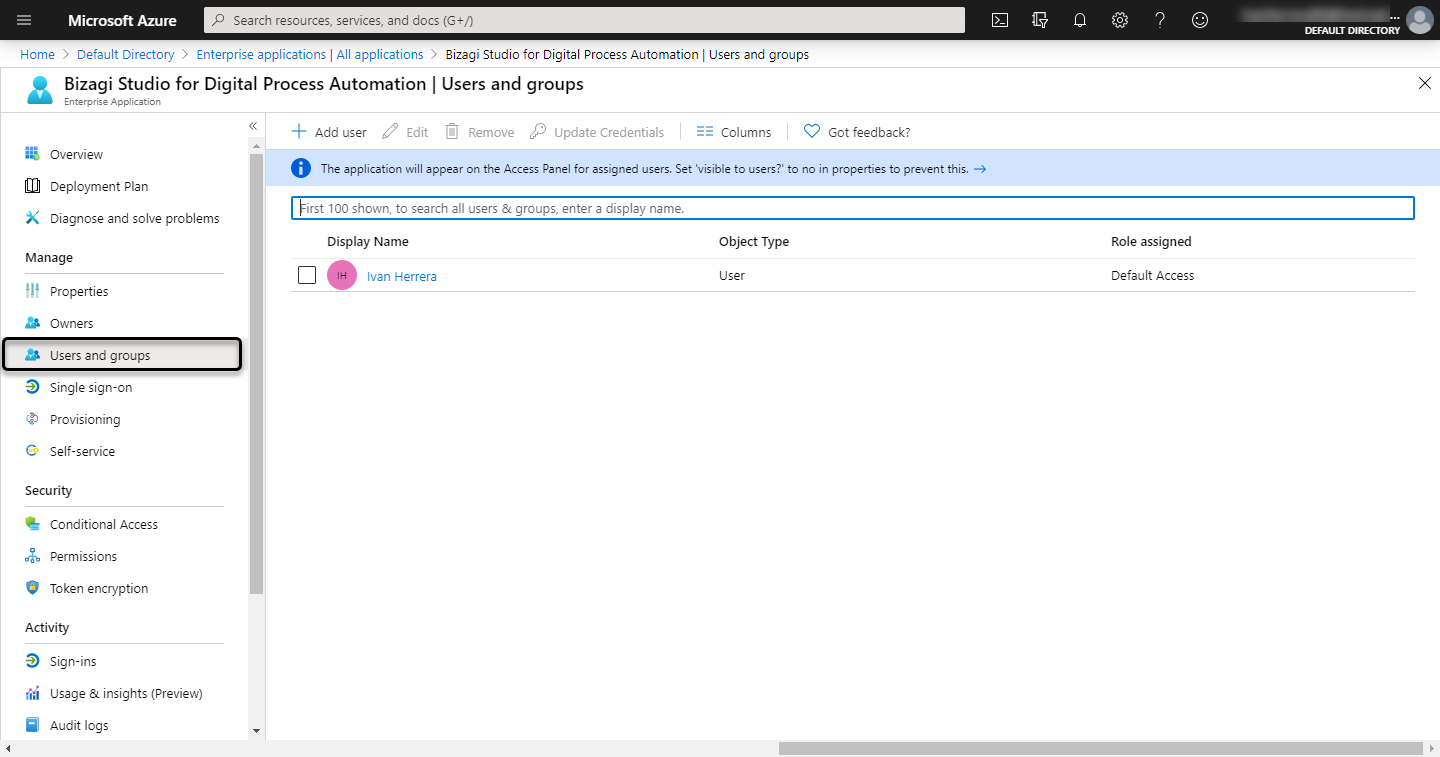
4.3 Define users that are going to be authenticated in Bizagi using Azure SSO
Define users that are going to be authenticated in Bizagi, using Azure SSO. Add them manually or with any predefined group on your Azure AD. Remember that users must be registered in Bizagi.
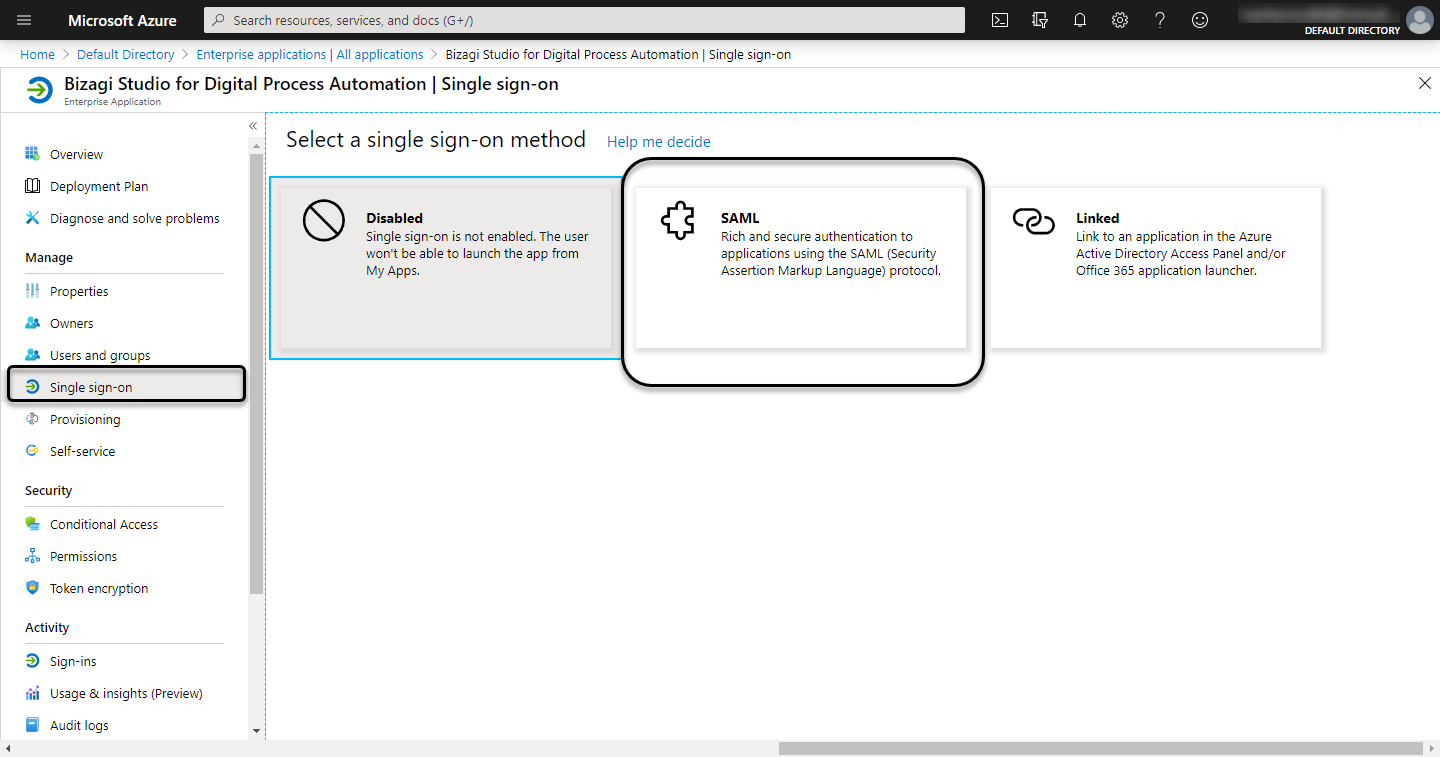
4.4 Configure the Single sign-on properties
Select the Single sign-on menu, and click the SAML option:
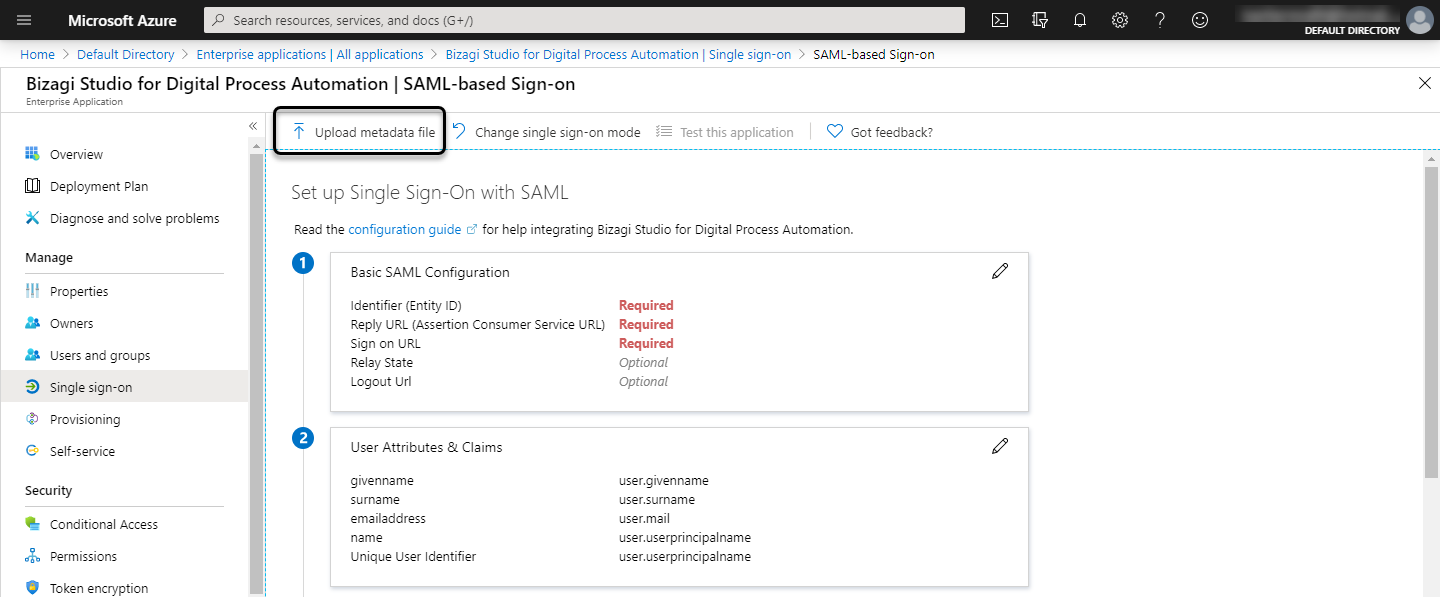
4.5 Set up the metadata file
Now you can upload the metadata file downloaded in step 2.1.
Review and fill the rest of mandatory fields:
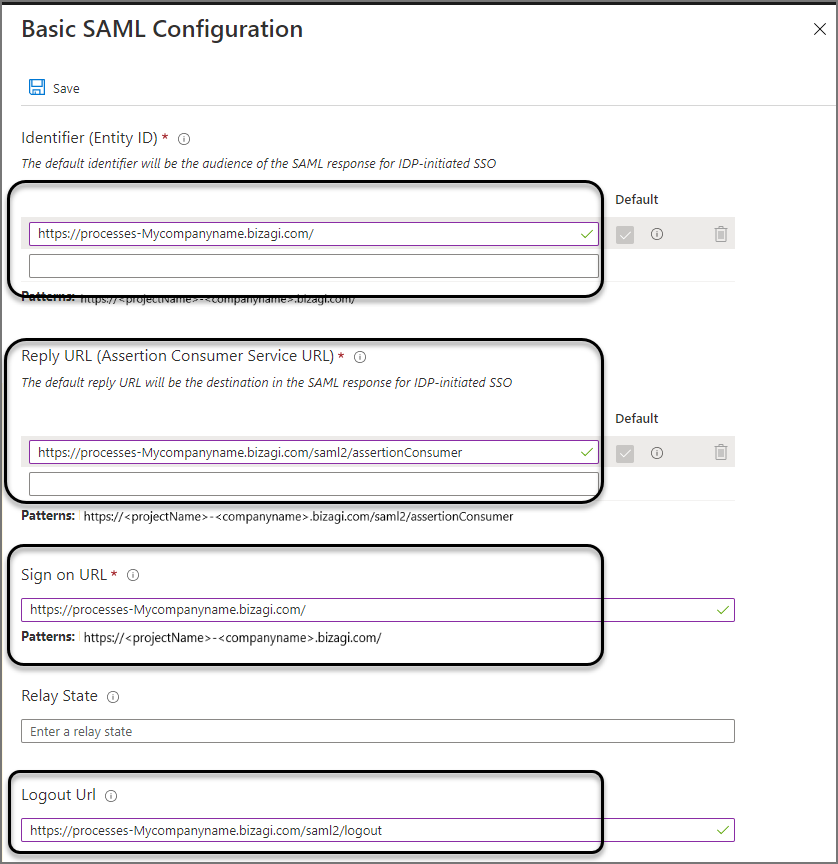
Sign on URL: is the Bizagi's Work Portal URL, for example, https://[environment]-[project]-[company].bizagi.com
Reply URL: This is the destination in the SAML response, for example, https://[environment]-[project]-[company].bizagi.com/saml2/assertionConsumer
Identifier (Entity ID): It is the Bizagi's Work Portal URL, for example, https://[environment]-[project]-[company].bizagi.com
Logout URL: It is the Bizagi's Work Portal logout URL, for example, https://[environment]-[project]-[company].bizagi.com/saml2/logout
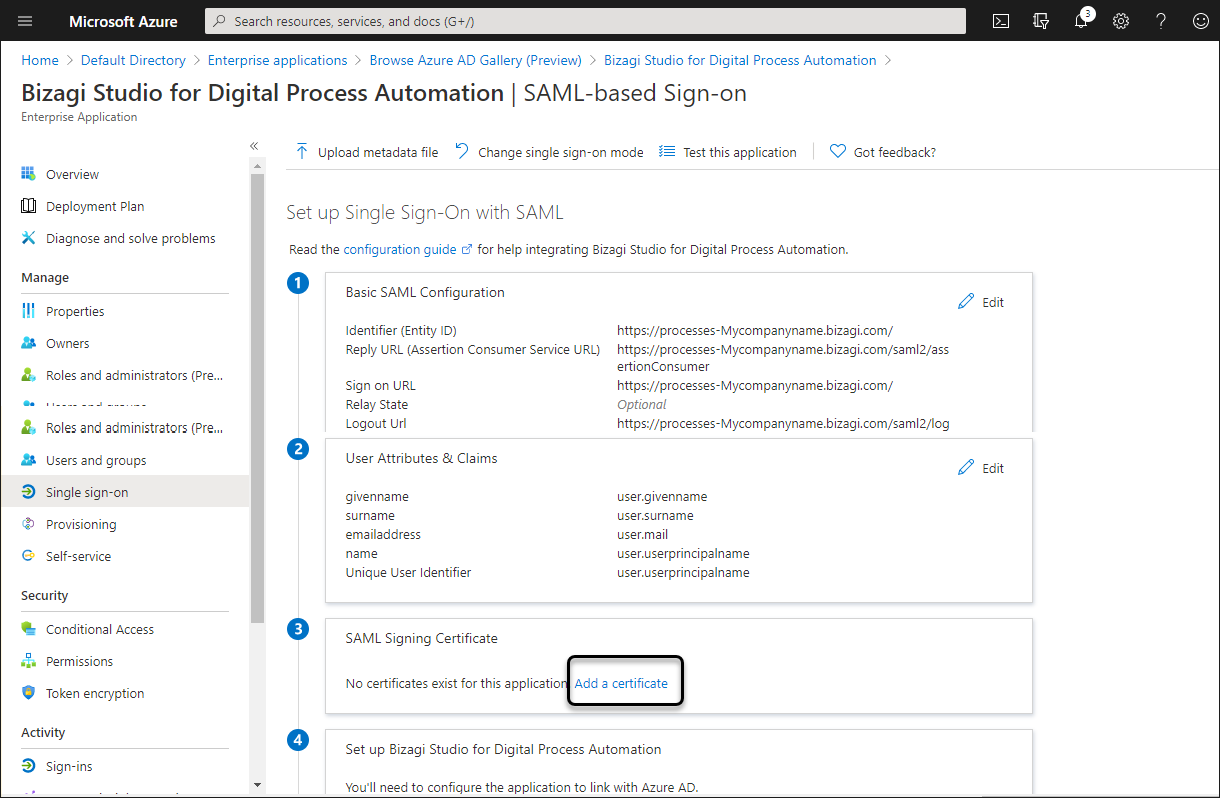
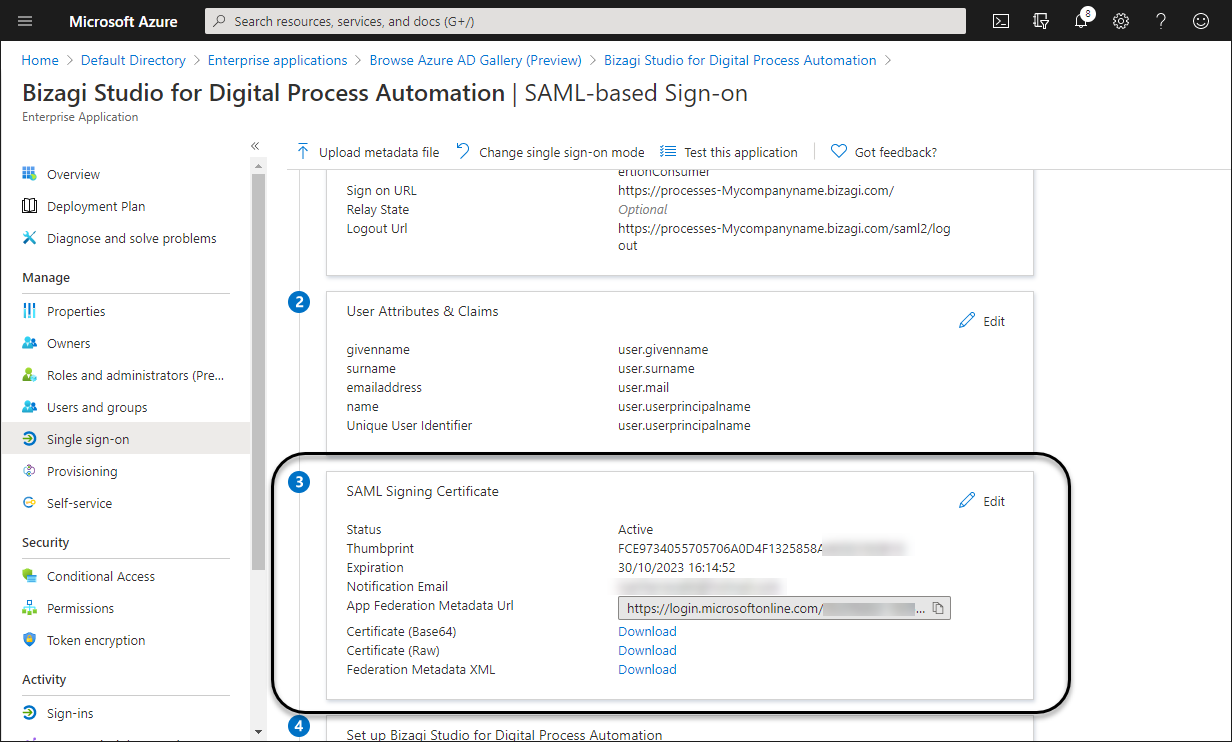
4.6 Verify or upload the certificate
You must include the SAML signing certificate. If the configuration does not have a certificate, click Add a certificate and upload the same certificate used in Bizagi's configuration.
If the certificate is configured correctly, you can see its properties. Make sure its status is active.
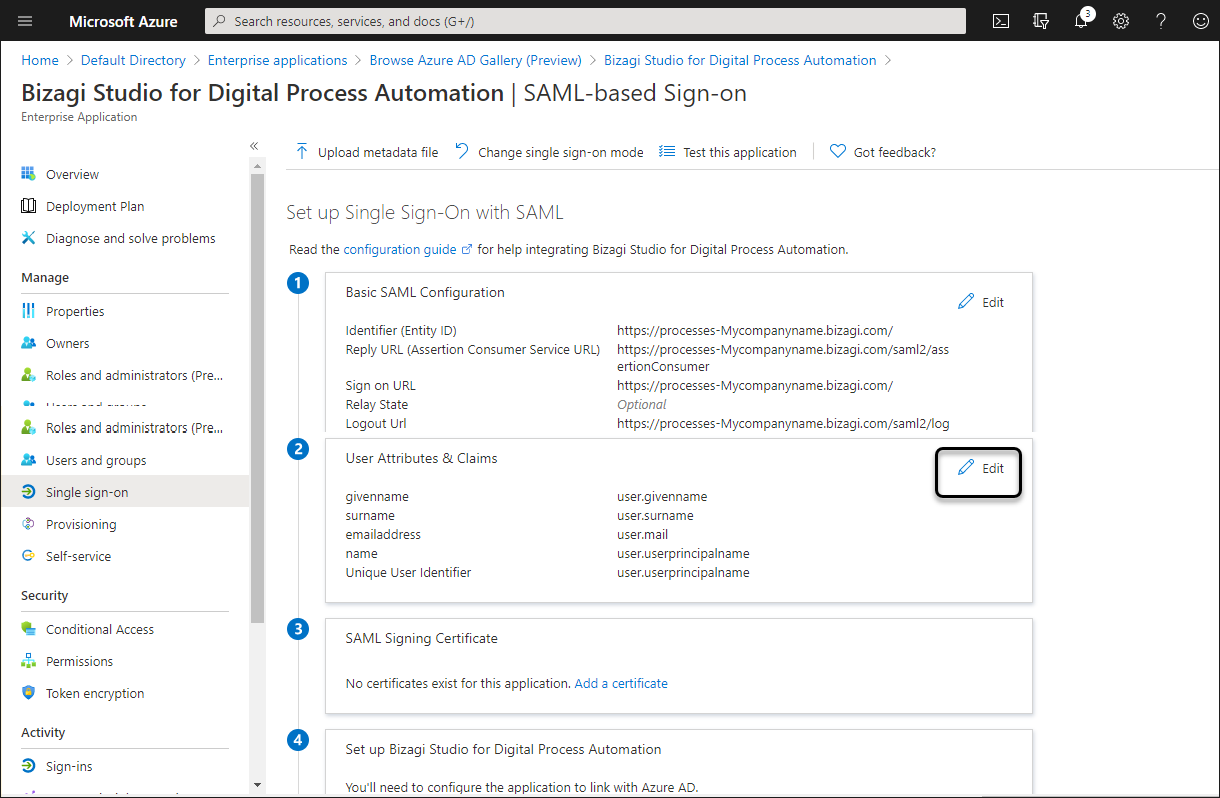
4.7 Define the Unique User Identifier
To identify users when they are being authenticated by Bizagi, you need to define the Unique Identifier. In Bizagi, unique identifiers for users are either email or the combination of domain and username. We recommend setting the email as the Unique Identifier. Click the edit icon in the User Attributes & Claims options:
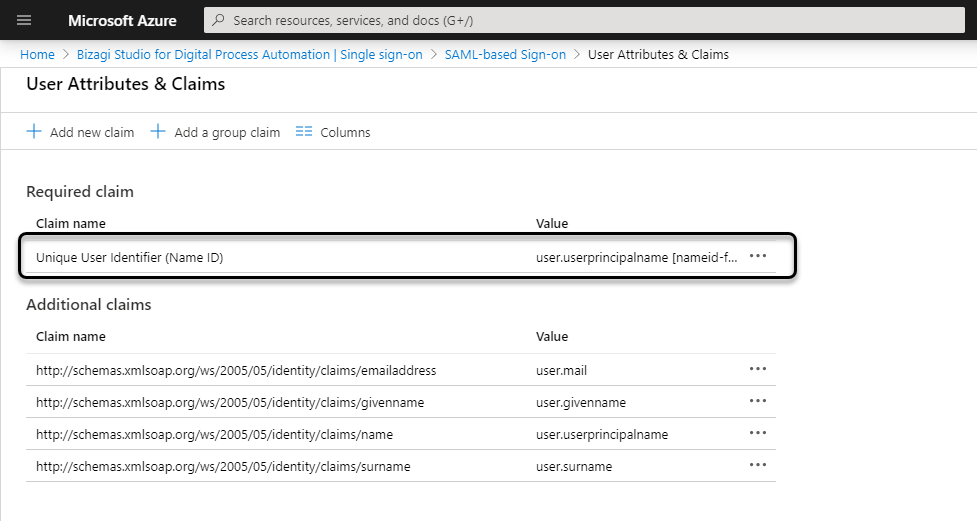
Click the Unique Identifier:
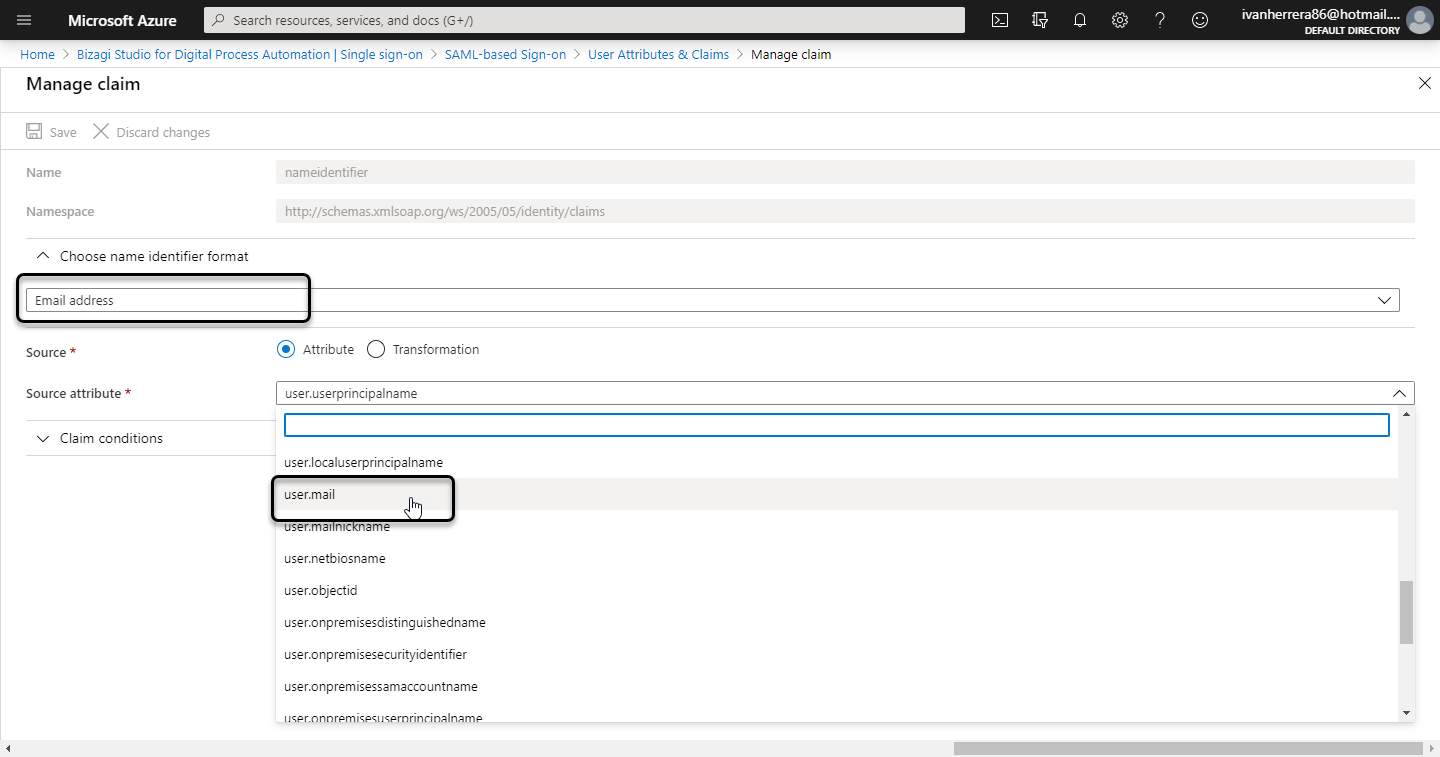
Select the Email Address format, and user.mail as the Source Attribute:
4.8 Get the metadata URL
Finally, copy the App Federation metadata URL:
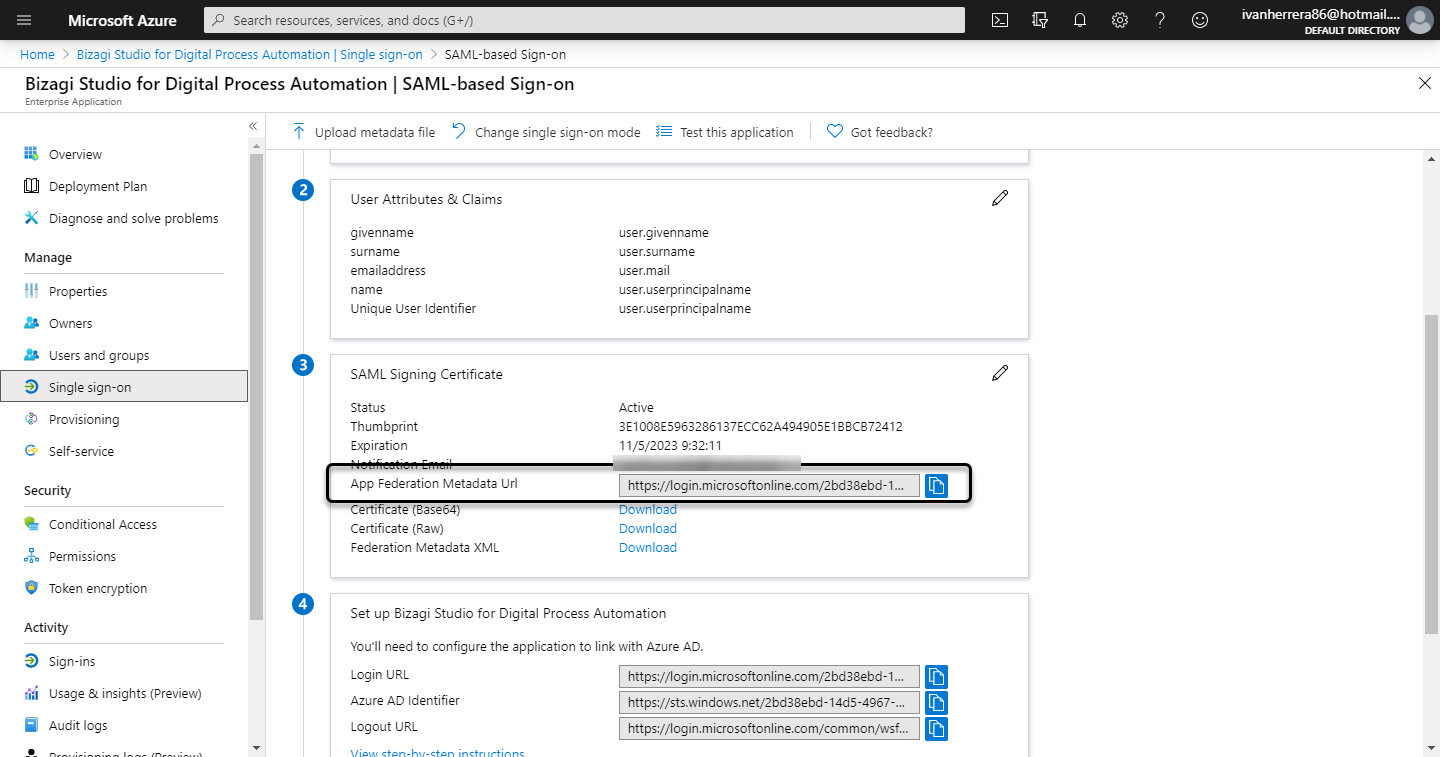
Note
The metadata URL must have the following format:
https://login.microsoftonline.com/[Tenant]/federationmetadata/2007-06/federationmetadata.xml?appid=[applicationID]It is very important to make sure that the
appidparameter is contained at the end of the URL.
Once you have this file's URL, go back to Bizagi and set it in this key:
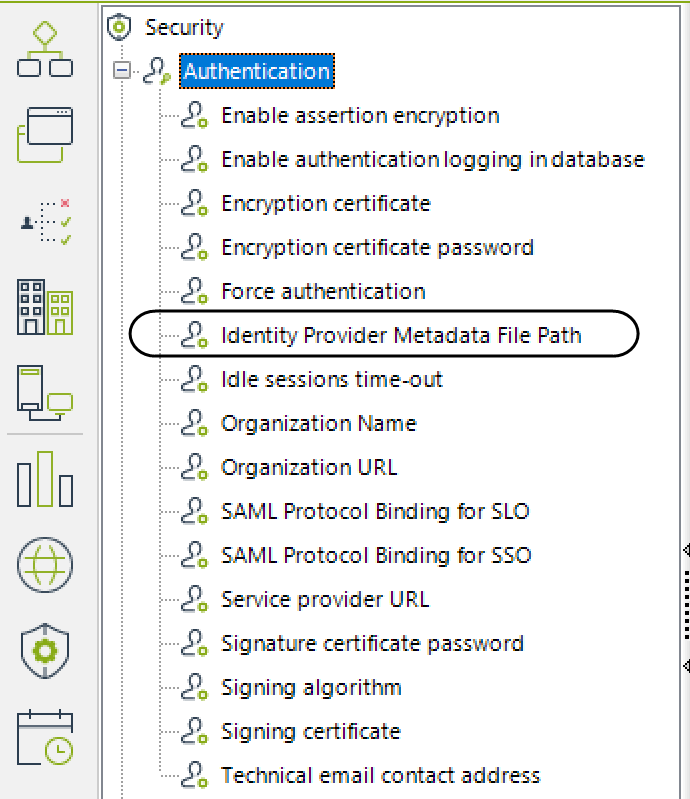
Now when you run the Work Portal, Bizagi displays the IdP's log-in page and users can be authenticated with your IdP.
Note
Remember to do this configuration in all your environments, or to deploy security configurations in your target environments, for example, test or production environments.